
Remi is a dog I’ve been working with who has a bit of a unique situation. Click here to read about how and why I got started training Remi. This particular blog post is dedicated to detailing her crate training progress and the procedure I used.
Crate Training
Remi, at 6 years old, had never been crated. Crate training is something I recommend for all dogs beginning at an early age, if at all possible. There are many reasons for this, but in Remi’s case, crate training was an absolute necessity for an unusual reason. In just a few weeks, she would be making the journey from Fort Worth, Texas, to the US Virgin Islands. This journey requires many, many hours in a crate.

The finished product: a crate-trained Remi!
Remi’s owner had already done her research. She purchased the appropriate airline-approved crate, and had read up on crate training an adult dog. Unfortunately, Remi didn’t warm up to the crate. Remi’s owner worried that Remi’s aversion to the crate would make the long, stressful journey even harder on her, or worse, that if the airline personnel let her out, they’d never be able to get her back in!
When I met Remi, her owner had already tried feeding her in the crate, verbally encouraging her to go in the crate, and physically forcing her into the crate. Nothing worked.
Crate training in a hurry
I had Remi crate trained within a few hours of arriving at my house. For the majority of dogs, it isn’t terribly difficult, and in this case, there was no other option (that always helps speed things along!). Here is the procedure I use most of the time for crate training in a hurry. Every dog is different, but by and large this works for most dogs:
- Take the time to show the dog it is OKAY to go in and out of the crate. Many dogs will resist going into the crate at first. Whether or not you believe that dogs are “den animals,” there isn’t a dog on the planet who sees a crate for the first time and thinks “Oh, you got me a den! Thanks so much!” Begin crate training by leading the dog in and out of the crate (leash and collar on) without closing the door. Praise for entering, and allow the dog to immediately exit. You are showing the dog that there is no threat to entering the crate (you’re not always stuck). Repeat, repeat, repeat until it ain’t no thang to go in the crate.
- Now that the dog will go in with no problems (hopefully happily, but at least with little resistance), it’s time to show him it’s no big deal to close the door. Lead him into the crate just as you’ve been doing, only this time as he’s making his u-turn, you’re closing the door. Don’t latch it yet, and don’t hold it closed for an eternity. Remember, your goal is to show your dog it’s no biggie, not to provoke a panicked response. Simply close the door, pause, open it and praise your dog as he exits (notice how relieved he seems!). Continue with this phase by S-L-O-W-L-Y building up the amount of time you leave the door closed. If at any point the dog begins to bark, whine, or paw at the door, give him a verbal “no!”, wait until he’s quiet and still, and then let him out. Cut down the amount of time you leave the door closed on the next repetition, and slowly work back up.
- Once your dog can go into the crate and sit in there for about 30 seconds without whining, it’s time to start walking away. The safety blanket of your presence won’t always be there – no better time than the present to start framing that idea. First, just walk a few feet away, make a u-turn, return to the crate, and open up the door to complete your repetition. Make sure to PRAISE for good behavior!! Just like in the last step, slowly work up the amount of time you’re out of sight, and don’t allow any barking, whining, escape attempts, or destructive behavior. Take. Your. Time.
- At some point, it’s time to take the leap away from this baby-stepping approach. You will get the feeling, at some point in this process, that the time is right. Your whole goal during this baby-stepping phase (#1-3) is to show your dog it’s okay to be in the crate, with the door closed, by himself. As soon as he gets this, it’s time to move on. How will you know? As you take your umpteenth baby step, you’ll look at your dog and think “this is ridiculous – you can totally do this!” …and that’s how you know it’s time to cut the cord! Cutting the cord means you lead your dog into the crate exactly as you’ve been doing it, only this time you’re walking away for 15-20 minutes. **IMPORTANT: the first few times you walk away for extended periods, you MUST be available to say “no” to any barking, whining, or destructive behavior of any kind. DO NOT leave the house until you’re sure your dog will relax in his crate. If you leave, there is no one there to tell him that destructive or anxious behavior is not okay. The more he practices these “bad” behaviors, the better he gets at them. You don’t want that, do you?
Depending on the dog and the situation, you may need to spend time working the dog up to being home alone in the crate. This means you have to give your dog time in the crate while you’re home and awake, slowly working up to extended periods of you being out of the house.
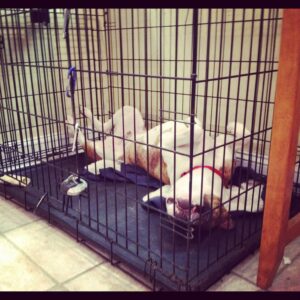
If you take the time to crate train right, you get a dog who relaxes in his crate!
You also may need to take your time in certain phases. Remi is a good representation of the “average” dog and in her case, Step 1 bled into Step 2 during our first practice session. I did several Step 2 practice sessions throughout the next few hours, and eventually, it bled into a very fast Step 3 and onto Step 4. She slept in her crate that night with no issues. This has been a typical progression for me; however, every dog is different, and a little patience and compassion goes a long way, even when you’re in a hurry.
This was my procedure for crate training in a hurry, but it is definitely not the only way to crate train a dog. It’s worth mentioning that this procedure leaves out a very powerful tool for crate training: building a positive association. If you are not in a terrible hurry, take the time to do things like feeding your dog in the crate, giving high value toys in the crate, etc. I’ve never found that this is absolutely necessary, but I’ve never found it to be harmful, and in many cases it was VERY helpful. Depending on your situation, it may be better to build this positive association before attempting the above procedure. There’s nothing wrong with that, and there are plenty of articles out there that detail these approaches.
Finally, here are some general crate training tips:
- Crate your dog with a high value toy (if appropriate) to keep him busy for the first few minutes. This helps take the edge off of your departure. Personally, peanut butter-filled bones or Kongs are my go-to items for this. My dogs LOVE to get in their crates if I wave a peanut butter-filled whatever in front of their noses! They literally run to their crates, and as I close each crate door they’re like “yeah, yeah, have a good day – I’ve got work to do on this tasty bone!”
- Make sure your dog has an appropriate, durable item to chew while crated. A Nylabone, antler, etc. work well. I usually select a bone that can be gnawed on over time, not destroyed in minutes (so no stuffed animals). Chewing is a great way to drain extra energy, so we want to give them that opportunity.
- If your dog will shred and swallow blankets, don’t put them in there. The LAST thing your dog needs is surgery to remove the blockage created by swallowed blanket pieces (this is also the last thing your wallet needs). Is it mean to put a dog in a crate without blankets? Only if your dog isn’t at risk of shredding them!
- Don’t give your dog the sad face when you put him in his crate. We all have the tendency to linger… “It’s okay Fido. I’ll be back soon. You just be a good boy. Mommy is so sorry for leaving you. I promise we’ll go for a walk when I get home. I’m so sorry, sweetie!” Sound familiar? Uh-huh… you know who you are! Hey, no judgement – we’re only human, but seriously, commit to putting an end to this right now. If the last thing your dog sees and hears is your sad, anxious face, body language, and tone of voice, how do you think he’s feeling as you leave? Instead, leave him with confidence! A simple “Good boy! Good stay!” and then confidently turning and walking away is my departure of choice. You can do whatever you want, but don’t linger, and don’t give sad faces or body language because that’s just not fair.
- Crate your dog for variable periods of time, especially if he’s struggling. Don’t always be away for 10 hours. If you know you’re going to be away for a long period of time, give your dog plenty of exercise before hand. Exercise alone won’t fix crate problems, but everyone feels better after a little exercise.
There are many other great crate training tips and advice out there, but these are a few of my favorites. I hope they help you through the crate training phase, and beyond!
Final thought: if you give this a strong effort and find that you’re still having issues, reach out for help before you abandon this crate training mission. There are many different factors that play into a dog’s behavior, so if your dog is still freaking out in the crate after you’ve tried your best, that’s a signal that your dog needs some extra help. Call a dog trainer! If you’re in the Dallas / Fort Worth area and you need help with crate training, or any other dog behavior issue, feel free to contact me. If you’re not in that area, here’s a list of other dog trainers like me!
Change is possible!